




Listening Article
Table of Contents
Semi Auto Blow Molding Machine Silencer, Parts and Compressor Maintenance
September 23, 2026
AI Summary
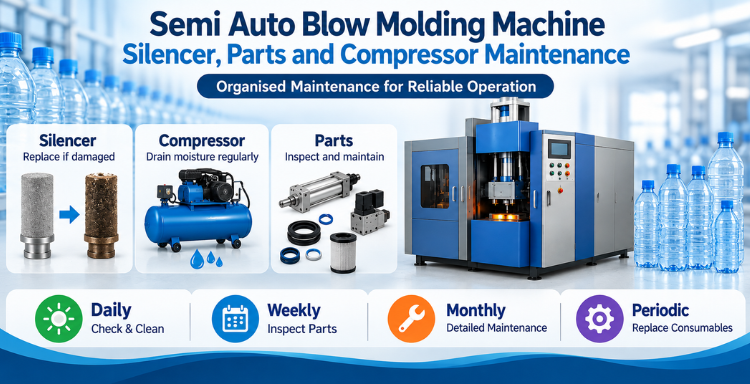
A semi auto blow molding machine for mineral water plant operations needs consistent, organised maintenance to run reliably. Identifying and replacing a damaged silencer, understanding how moisture from the compressor contributes to that damage, and following daily, weekly, monthly and periodic preventive maintenance for the machine’s cylinders, bolts and moving parts all play a part in that. So do the basic functions of the electrical control panel, the main components of the machine, and the general upkeep required for the high pressure air compressor and dryer. Recognising warning signs early and knowing when to bring in trained personnel rounds out a sound maintenance routine.
 Call Now!
Understanding Semi Auto Blow Molding Machine Maintenance
A semi auto blow molding machine for mineral water plant production works continuously across daily production runs, which means its cylinders, valves, pneumatic lines and electrical panel are all under regular use. Without organised inspection, small issues such as a loose bolt or a draining lapse can turn into larger repairs.
Dharmanandan Techno Projects Pvt. Ltd. (DTPPL) offers semi automatic PET blow moulding machines used for producing mineral water jars ranging from 5 to 20 litres, built with a combination of pneumatic and hydro pneumatic designs for consistent output. Maintaining these machines properly protects both output quality and equipment life, and it starts with knowing what to check, and how often.
Proper care covers the machine’s silencer, cylinders, control panel, core components, and compressor and dryer system, each with its own routine and warning signs to watch for.
How to Identify a Damaged Silencer in a Semi Auto Blow Molding Machine
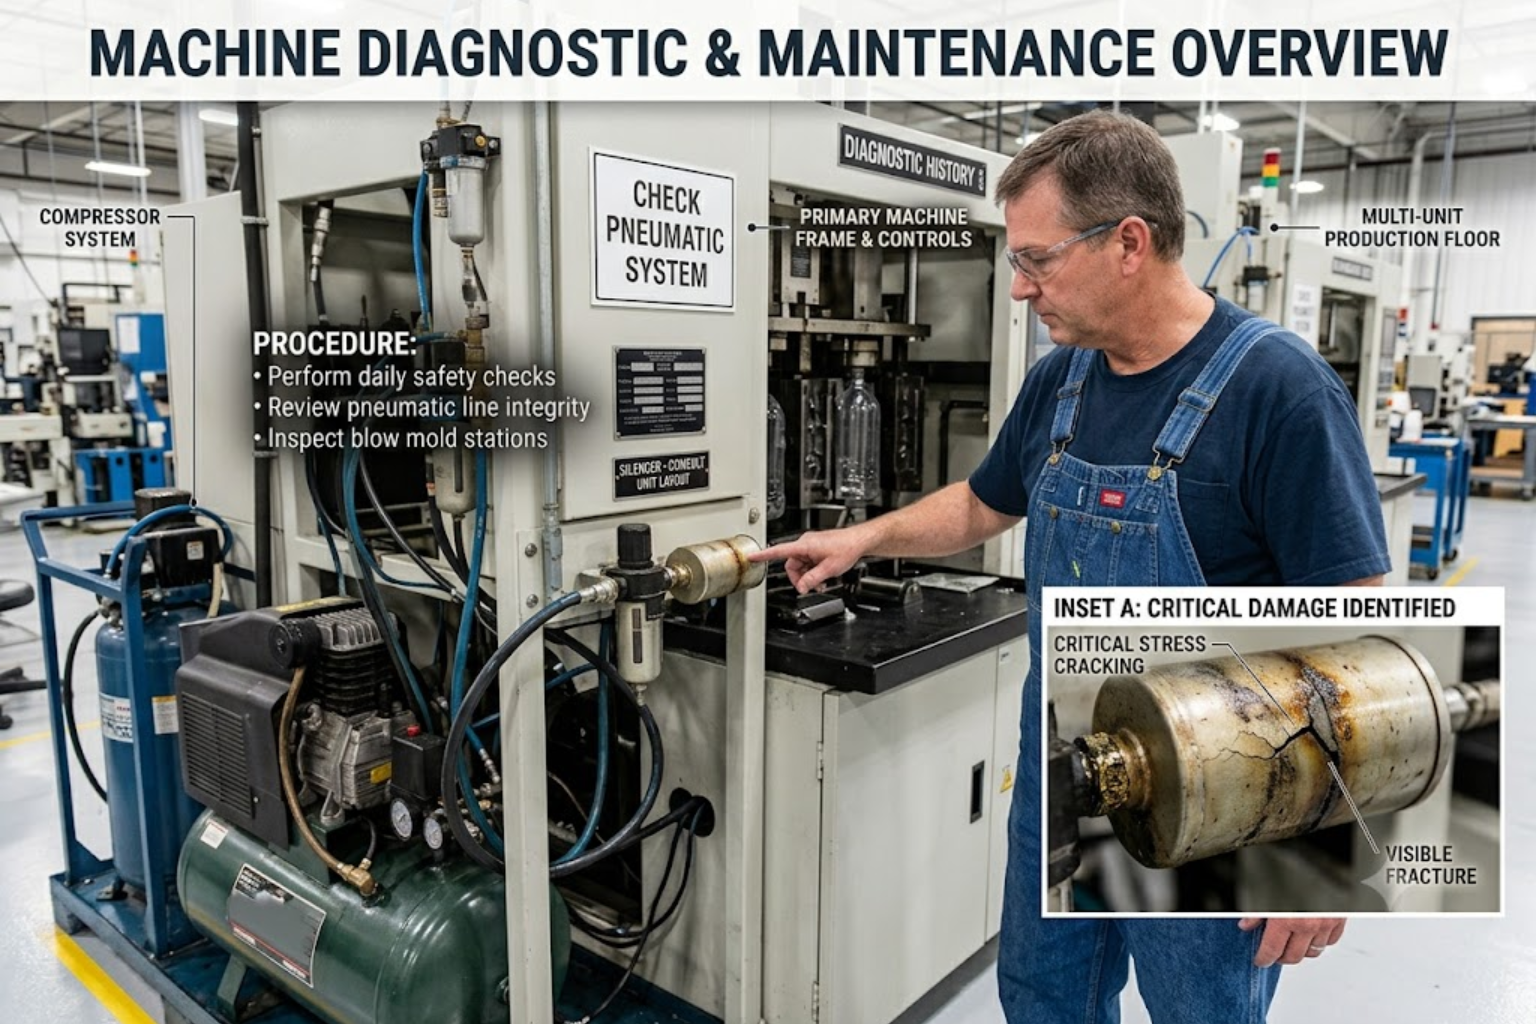
Excessive noise from the pneumatic system is usually the first sign of a damaged silencer. The silencer sits near the compressor supply line, and its exact position can vary depending on the machine configuration, so operators should refer to the specific unit’s layout rather than assuming a fixed location.
The underlying cause is moisture. Air coming from the compressor carries water along with it. If the compressor receiver is not drained regularly, this moisture bypasses the dryer, enters the PET blow moulding machine, and travels through the valve. From there, it reaches the silencer. A silencer that becomes wet is prone to bursting, which produces a sharp rise in noise from the pneumatic system.
Because this moisture also affects valves, O rings and other pneumatic components, a noisy silencer is often an early indicator of a wider drainage issue rather than an isolated fault.
How to Replace the Blow Molding Machine Silencer
Once a silencer is confirmed to be damaged, it should be replaced by appropriately trained maintenance personnel using the following steps.
- Locate the silencer on the pneumatic line near the compressor supply.
- Use a 20 or 22 size spanner to remove the damaged silencer.
- Apply Teflon tape to the replacement silencer before fitting it.
- Fit the new silencer in place and tighten it properly to ensure a secure seal.
Replacing the silencer addresses the immediate noise problem, but it does not remove the root cause. Preventing repeat failures depends on limiting how much moisture reaches the silencer in the first place, which is covered in the maintenance checklists below.
Daily Preventive Maintenance Checklist for a Semi Auto Blow Molding Machine
Daily checks focus on the parts that move every time the semi automatic PET blow moulding machine runs, since regular movement is what causes bolts and joints to loosen over time.
- Inspect all bolts on the machine, including those on the centre cylinder, and tighten any that have become loose.
- Check the movement of the stretching cylinder to confirm it moves smoothly, without sticking or restriction.
- Confirm that the plate associated with the stretching cylinder remains level, since an uneven plate shifts the load onto the cylinder rod and can lead to damage.
- Verify that the stretching cylinder load is properly balanced across its mounting bolts.
- Drain the compressor receiver tank to remove accumulated water. Draining twice a day is recommended to further reduce moisture reaching the silencer.
- Check the compressor’s lubrication oil level before starting.
- Confirm that the input electrical supply is stable before starting the compressor.
- Watch and listen for any unusual noise or vibration from the compressor, and report it to the appropriate service team.
Keeping up with these checks limits how much moisture reaches the valves and silencer, which directly reduces the chance of the pneumatic issues described earlier.
OUR OTHER PRODUCT
Weekly Preventive Maintenance Checklist for a Semi Auto Blow Molding Machine
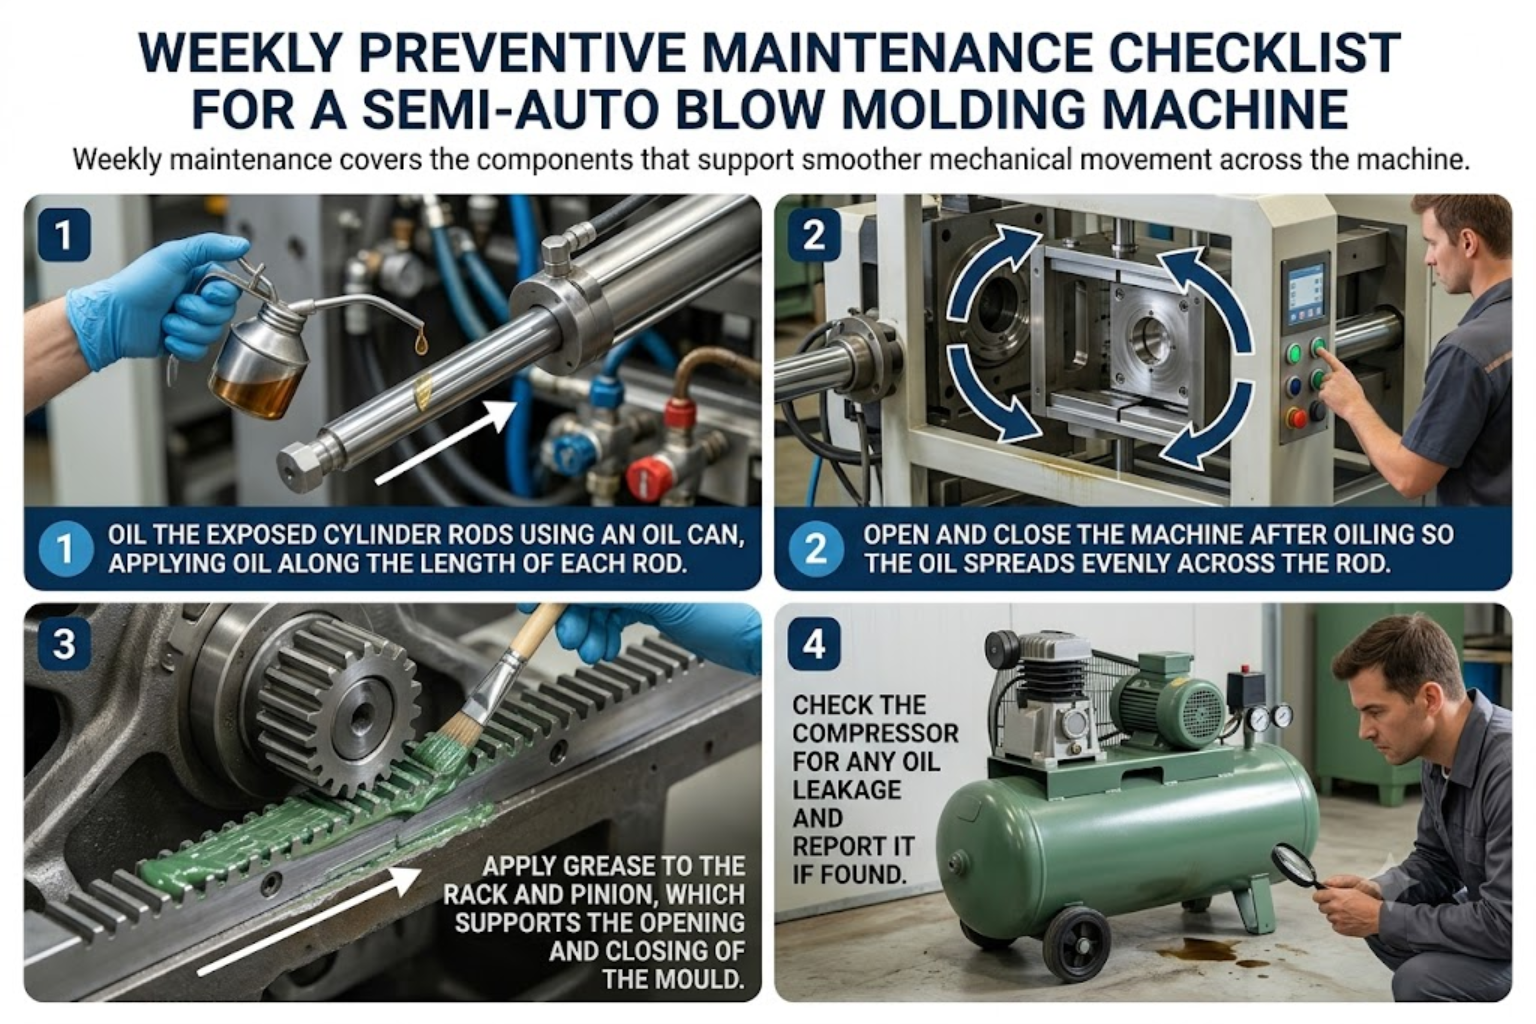
Weekly maintenance covers the components that support smoother mechanical movement across the machine.
- Oil the exposed cylinder rods using an oil can, applying oil along the length of each rod.
- Open and close the machine after oiling so the oil spreads evenly across the rod.
- Apply grease to the rack and pinion, which supports the opening and closing of the mould.
- Check the compressor for any oil leakage and report it if found.
- Check that the compressor’s safety valves are operating correctly, since a faulty safety valve can allow air pressure to build up unsafely.
- Inspect compressor bolts and tighten any that have loosened during operation.
- Inspect and clean the compressor’s air filters, needed weekly or, at the latest, every 15 days to prevent dust from entering the compressor.
Regular oiling and greasing support smoother movement of the cylinders and mould mechanism, reducing strain on the components involved in each production cycle.
Client Review
“We have been using DTPPL’s semi automatic PET blow molding machine for our mineral water production, and the machine has been reliable for our regular operations. The maintenance process is straightforward, and the technical guidance provided by the DTPPL team has been helpful whenever we needed assistance. Overall, the machine has been a practical solution for our production requirements.”
– Ardeshir Wadia
Monthly and Periodic Maintenance Checklist for a Semi Auto Blow Molding Machine
Monthly and quarterly checks focus on the hydraulic system and broader compressor upkeep.
Monthly
- Check the oil level in the hydraulic cylinder after the mould has opened. If the level is insufficient, add hydraulic oil number 32.
- Check that the compressor belt is properly tight.
Quarterly
- Check the relevant oil level in the stretching cylinder using the gauge provided.
- Drain and refill this oil every three months, opening the top bolt to fill and the lower bolt to drain.
- Change the compressor oil, which should be done every three months without exception.
- Inspect the dryer filter and replace it, also on a three month interval.
Periodic
- Have the compressor serviced after approximately six months of continuous operation to avoid future issues.
A simple table can help production teams track these intervals at a glance.
Interval | Machine Tasks | Compressor and Dryer Tasks |
Daily | Bolt checks, cylinder movement, plate alignment | Oil level, receiver drain, input supply, noise check |
Weekly | Cylinder rod oiling, rack and pinion greasing | Oil leakage, safety valve check, filter cleaning |
Monthly | Hydraulic cylinder oil check | Belt tightness |
Quarterly | Stretching cylinder oil drain and refill | Oil change, dryer filter replacement |
Periodic | Compressor service after six months |
Understanding the Blow Molding Machine Control Panel
The control panel manages how power reaches and controls the machine, and knowing its basic layout helps operators recognise where issues originate.
Main Input The panel receives the machine’s main electrical input, which supplies power to the core equipment. Specific voltage and phase details should be confirmed against DTPPL’s official documentation for the machine in use rather than assumed from general reference.
Heater Connections Separate wiring within the panel connects to the machine’s heating system, which is responsible for heating the preforms before the blowing stage.
SSR The SSR (Solid State Relay) controls the electrical power delivered to the heating system according to the heater setting selected by the operator.
SMPS The SMPS supplies suitable low voltage DC power to the PLC, converting the incoming supply into the form the PLC requires to operate.
PLC The PLC functions as the control centre of the machine, coordinating its operation much like a central nervous system for the equipment.
Conveyor Drive and Preform Rotation Drive One drive controls the speed of the conveyor chain that carries the preforms through the machine. A second drive separately controls preform rotation as the preforms pass through the heating section.
Only trained and authorised electrical personnel should open, inspect or carry out repairs on the control panel. Working on the panel without the right training carries a genuine electrical risk, and it should never be treated as routine handyman work.
Main Parts of a Semi Auto Blow Molding Machine
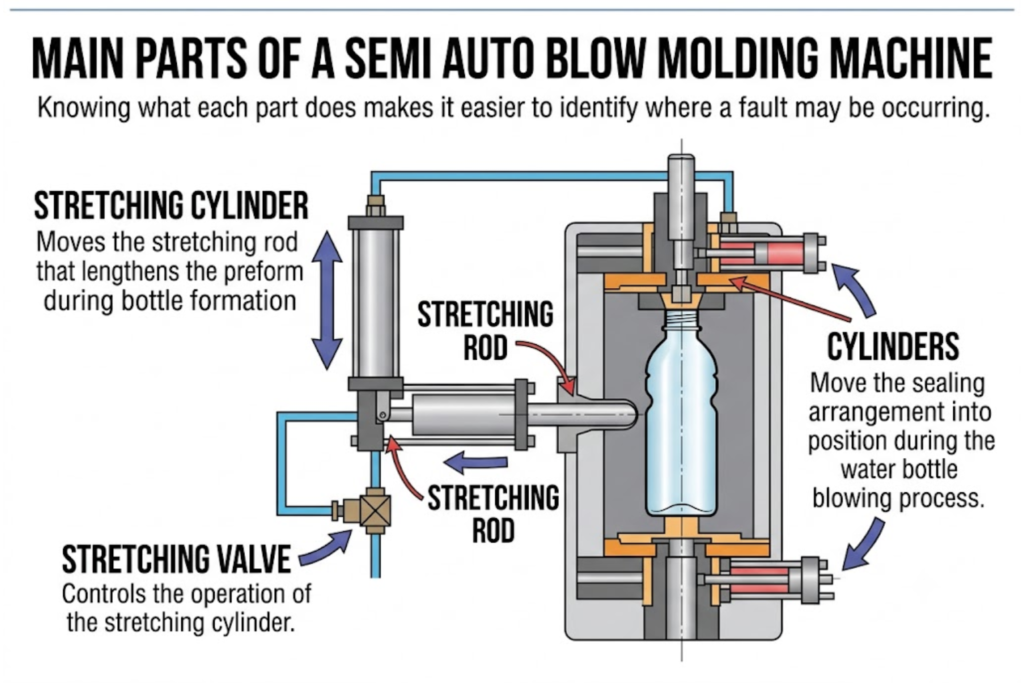
Knowing what each part does makes it easier to identify where a fault may be occurring.
- Sealing Cylinders: Move the sealing arrangement into position during the water bottle blowing process.
- Stretching Cylinder: Moves the stretching rod that lengthens the preform during bottle formation.
- Stretching Valve: Controls the operation of the stretching cylinder.
- Sealing Valve: Controls the operation of the sealing cylinders.
- LP and HP Valve: Controls whether low pressure or high pressure air is applied during the blowing stage.
- Low Pressure Regulator: Regulates how much air pressure is supplied to the low pressure side of the system.
- VRA (Valve Regulator Assembly): Controls the opening and closing of the mould.
- Hydraulic Clamping Support: A hydraulic arrangement that helps hold the mould closed against the pressure generated during blowing, preventing it from opening unintentionally.
- Gear Motor: Drives the movement of the conveyor chain that carries the preforms.
- Rotation Motor: Rotates the preforms as they move through the heating section.
Each of these components plays a specific role in the blowing cycle, and knowing their function makes it easier to communicate clearly with technical support when something needs attention.
High Pressure Air Compressor and Dryer Maintenance for a Semi Auto Blow Molding Machine
The compressor and dryer support the entire pneumatic system, so their upkeep directly affects machine reliability.
On the compressor side, daily attention should go to the lubrication oil level, draining the receiver tank, listening for unusual noise or vibration, and confirming a stable input supply before starting. Weekly checks cover oil leakage, safety valve function, loose bolts, and cleaning the air filters, which should also be checked at least every 15 days. Belt tightness should be reviewed monthly. Compressor oil must be changed every three months, and the unit should be serviced after around six months of running time.
The dryer removes water carried in the compressed air before it reaches the machine. If water is not drained daily, it accumulates and eventually enters the pneumatic system. Regular checks should confirm that water is draining correctly, that the dryer’s valve is functioning, and that air is being released properly. The dryer’s internal filter should be inspected and replaced every three months.
Keeping this system in good order is one of the most effective ways to reduce silencer, valve and O ring issues elsewhere in the blow molding machine.
Warning Signs That Require Technical Assistance for a Semi Auto Blow Molding Machine
Certain signs should prompt a pause in operation and a call to trained personnel rather than continued use.
- Excessive or unusual noise from the pneumatic system
- Abnormal vibration from the machine or compressor
- Visible air or oil leakage
- Cylinder movement that is sticking, uneven or unreliable
- Loose connections or bolts that recur despite tightening
- Dryer issues such as water not draining or the valve not functioning
- Any irregular behaviour from the control panel
- A compressor safety valve that does not appear to be working correctly
Reporting these signs early, rather than continuing to run the machine, helps avoid larger breakdowns and keeps production more consistent.
DTPPL Support for Blow Molding Machine Maintenance
DTPPL supports mineral water treatment plant teams with machine manuals, maintenance checklists and technical guidance for its semi automatic PET blow moulding machines. Plant teams working with DTPPL equipment can reach out for detailed information on any of the maintenance points covered here, or for support specific to their machine’s configuration and running hours.
OUR OTHER PRODUCT
Conclusion
Reliable operation of a semi auto blow molding machine comes down to consistent, organised inspection rather than occasional fixes. Draining the compressor daily, checking bolts and cylinder movement, oiling and greasing weekly, reviewing hydraulic oil monthly and quarterly, and keeping the compressor and dryer on schedule together reduce the chance of unexpected downtime. Understanding the control panel and core components also means plant teams can describe issues clearly when trained support is needed. Following these intervals consistently is what keeps a semi auto blow molding machine, and the production line depending on it, running smoothly.
 Email Us Now!
Frequently Asked Questions About Semi Auto Blow Molding Machines
Why does a semi auto blow molding machine silencer produce excessive noise?
Excessive noise usually means the silencer has been damaged by moisture. Water carried in compressed air can travel through the valve and reach the silencer, and a wet silencer is prone to bursting, which increases noise.
How often should the compressor receiver tank be drained on a blow molding machine?
The receiver tank should be drained daily, and draining it twice a day helps further limit the moisture reaching the machine’s valves and silencer.
Which blow molding machine parts require weekly oiling and greasing?
The exposed cylinder rods need weekly oiling, and the rack and pinion, which opens and closes the mould, needs weekly greasing.
What is the function of the VRA in a semi auto blow molding machine?
The VRA, or Valve Regulator Assembly, controls the opening and closing of the mould during the production cycle.
What does the SSR do in a blow molding machine control panel?
The SSR controls the electrical power supplied to the machine’s heating system based on the heater setting selected.
How often should compressor oil be changed on a semi auto blow molding machine?
Compressor oil should be changed every three months, and the compressor should be serviced after around six months of operation.
When should a mineral water plant contact DTPPL for blow molding machine technical assistance?
Plant teams should contact DTPPL when they notice unusual noise or vibration, leakage, sticking cylinder movement, dryer problems, control panel irregularities or a safety valve that is not functioning properly.
Our associates











































Director – Global Marketing and Sales
Mr. Bhavesh from Dharmanandan Techno Projects Pvt. Ltd. has played a pivotal role in elevating the DTPPL brand to the global stage, leveraging his exceptional expertise in marketing and communications. He is committed to helping clients achieve significant growth while strengthening their own brands. Dharmanandan Techno Projects Pvt. Ltd. is a leading manufacturer and supplier of water purification systems and turnkey solutions for mineral water plants. With years of experience in designing and delivering high-quality water treatment solutions, the company provides end-to-end services, including system design, installation, maintenance, and ongoing support. Specializing in scalable and customizable water plants, DTPPL has successfully served industries worldwide, ensuring clean and safe drinking water across diverse applications.