




Listening Article
Table of Contents
3 Cavity Auto Blow Molding Machine Sensor Settings, Bottle Quality, and PLC Control in Mineral Water Plants
September 28, 2026
AI Summary
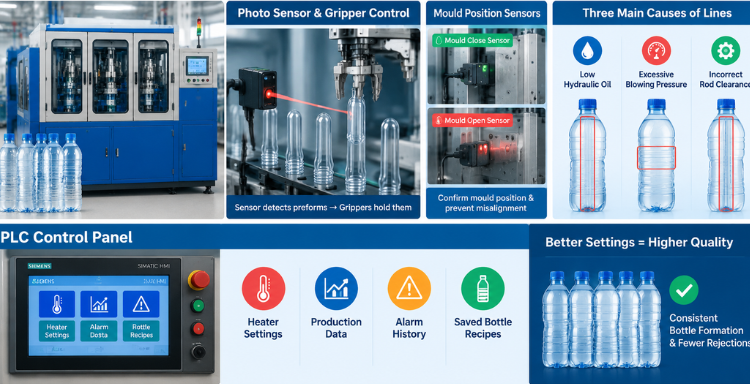
This guide explains how the photo sensor detects preforms and commands grippers to hold them during the molding cycle. It covers the separate mould open and mould close sensors that confirm mould position and prevent misalignment. This content identifies three causes of visible vertical or particle lines on PET bottles: low hydraulic oil, excessive blowing pressure, and incorrect rod clearance. It also explains the PLC control panel functions for managing heater settings, production data, alarm history, and saved bottle recipes. Following these settings helps mineral water plant teams maintain consistent bottle formation and reduce rejections.
Understanding the 3 Cavity Auto Blow Molding Machine for Mineral Water Production
Dharmanandan Techno Projects Pvt. Ltd. manufactures automatic PET blow moulding machines designed for mineral water plants, juice plants, and beverage production facilities. The 3 cavity auto blow molding machine automates three main processes: preform heating, bottle formation through mould closing and blowing, and automatic bottle discharge. Three heated preforms enter simultaneously, gripped by three separate grippers that position them inside three moulds. Pressurised air blows the heated preforms into bottle shapes, then the moulds open and finished bottles drop for collection.
 Call Now !
How the Photo Sensor Controls Preform Movement in the 3 Cavity Auto Blow Molding Machine
The photo sensor detects preform arrival and sends an electronic command to the grippers. Three preforms arrive simultaneously, and the sensor must detect the third preform to trigger all three grippers to grip and move preforms towards the moulds. This coordinated timing ensures all three preforms are gripped and positioned correctly before the mould closes and the blowing cycle begins.
How to Set the Photo Sensor Correctly on Your 3 Cavity Blow Molding Machine
Incorrect photo sensor positioning causes preforms to fall, grippers to fail, and machine sequencing errors. To set the photo sensor correctly:
- Locate the sensor mounting bolt and loosen it
- Position the sensor facing directly at the third preform as it approaches
- Tighten the mounting bolt securely after correct positioning
- Observe grippers to confirm they respond when the third preform is detected
- Monitor the first production cycle for proper gripper response
Correct sensor alignment ensures grippers respond at the right moment and production runs smoothly without unnecessary rejections.
How the Mould Open and Close Sensors Work in the 3 Cavity Auto Blow Molding Machine
The 3 cavity auto blow molding machine uses two separate metal sensors to monitor mould position: one for open, one for closed. Each sensor has an indicator light that illuminates when the mould reaches its position. The mould open sensor confirms full separation for safe bottle removal. The mould close sensor confirms the plates are locked and ready for blowing.
When the mould close sensor detects the closed plate position, its light illuminates, signalling to the PLC that the mould is locked. If the mould close sensor does not detect the closed position, the mould may close but then open again without remaining locked.
How to Check a Mould Sensor Mismatch on Your 3 Cavity Blow Molding Machine
If the mould does not open, fails to close, or closes then opens without locking, a sensor mismatch is likely. Follow these steps:
- Stop the machine and place it in manual mode
- Manually close the mould and observe the mould close sensor light
- Check for dirt, dust, or debris on the sensor surface
- Clean the sensor and mould plate contact area gently
- Manually open the mould and observe the mould open sensor light
- If sensor lights illuminate correctly but mould problems persist, contact DTPPL
OUR OTHER PRODUCT
Why a Particle Line Appears on the PET Bottle in the 3 Cavity Auto Blow Molding Machine
A visible vertical or particle line on PET bottles indicates the mould opened slightly during the blowing cycle. Any opening allows pressurised air and melted plastic to escape, creating a visible line that results in rejection.
Three main causes lead to mould opening during blowing:
- Low Hydraulic Oil: Insufficient oil pressure cannot maintain the force needed to hold the mould closed
- Excessive Blow Pressure: High air pressure overcomes hydraulic pressure and forces the mould open
- Incorrect Rod/Plate Clearance: Improper clearance prevents complete closure or creates misalignment
How to Check Hydraulic Oil and Mould Holding Pressure in Your 3 Cavity Blow Molding Machine
The hydraulic cylinder maintains pressure behind the closed mould plates. If oil level drops below minimum, the cylinder cannot maintain full pressure, and the mould may open slightly.
To check and add hydraulic oil:
- Place the mould in fully open position using manual control on the PLC
- When open, the cylinder shaft extends completely outward
- Only when the shaft is extended can you safely access the hydraulic oil filling point
- Never open the filling point while mould is closed, as pressure will force oil out
- Check oil level visually and add hydraulic oil per your DTPPL machine manual
- After adding oil, close the filling point cover securely
- Run a test cycle to confirm proper pressure
How to Check High Blow Pressure and Rod Clearance on Your 3 Cavity Auto Blow Molding Machine
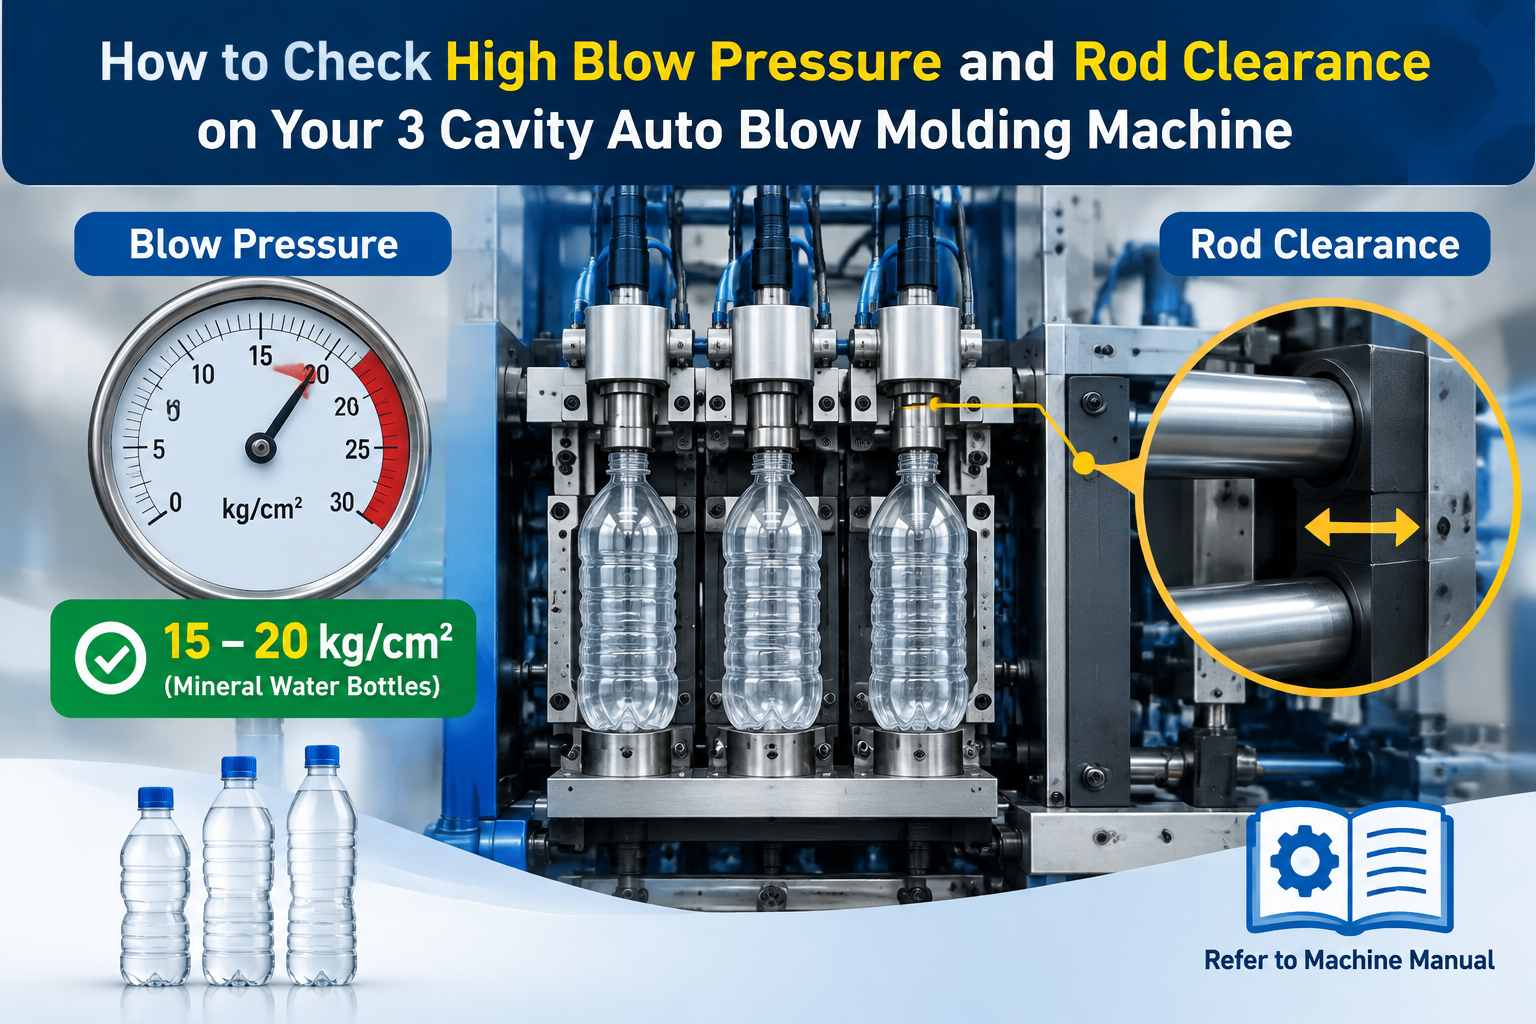
Excessive blowing pressure overcomes the hydraulic pressure holding the mould closed. The appropriate pressure range depends on your bottle size and mould design. For mineral water bottles, the typical pressure is between 15 kg and 20 kg. Always consult your DTPPL blow molding machine manual for exact settings.
To adjust blow pressure:
- Locate the high pressure regulator nut on the blow pressure control assembly
- Loosen the nut slightly to allow adjustment
- Turn counterclockwise to decrease pressure; clockwise to increase
- Set pressure appropriate for your bottle size
- Run a test cycle and observe finished bottles for defects
To set rod and plate clearance:
- Place the mould in fully open position
- Loosen the rod adjustment nut carefully
- Move the rod forward until it touches the front plate lightly
- Move it back slightly to create a gap of approximately 2 mm to 3 mm
- Tighten the adjustment nut securely
- Run a test cycle to confirm smooth closing
Safety Note: Hydraulic, pressure, and mechanical adjustments should be performed only by trained personnel.
How the PLC Control Panel Works on Your 3 Cavity Auto Blow Molding Machine
The PLC (Programmable Logic Controller) control panel is the electronic brain of the blow moulding machine. It monitors all sensors, controls all functions, and displays production data.
The home page is where operators spend most of their time. From this main screen, you can:
- View and adjust heating temperature settings
- Switch between automatic and manual operating modes
- View and clear any active alarms
- Monitor cycle time in seconds
- View bottles produced per hour
- View today’s production count and total machine production
- Reset the daily production counter
Client Review
“Excellent machine from DTPPL with reliable performance, easy operation, and consistent PET bottle production.”
– Mallika Desai
How to Use Timer, Recipe, Input and Output Screens on Your 3 Cavity Blow Molding Machine
The Time Setting screen allows you to adjust time delays in the PLC program. The Edit Recipe screen allows adjustment of shutdown delay, sealing delay, and low blow delay. Changes should be made only under guidance from DTPPL or according to your authorised operating manual.
The View Recipe screen shows current timer and heater settings. Recipe files allow you to create separate configurations for different bottle sizes like 250 ml, 500 ml, and 1 litre bottles. When you change the mould, simply load the corresponding recipe file. The PLC automatically applies all correct settings, eliminating manual entry and reducing errors.
The Input List screen displays the status of all machine sensors. The Output List shows whether functions like stretching, sealing, and low blow are operating. The Alarm History screen displays all recorded alarms for identifying patterns and recurring issues.
Troubleshooting Checklist Before Restarting Production on Your 3 Cavity Blow Molding Machine
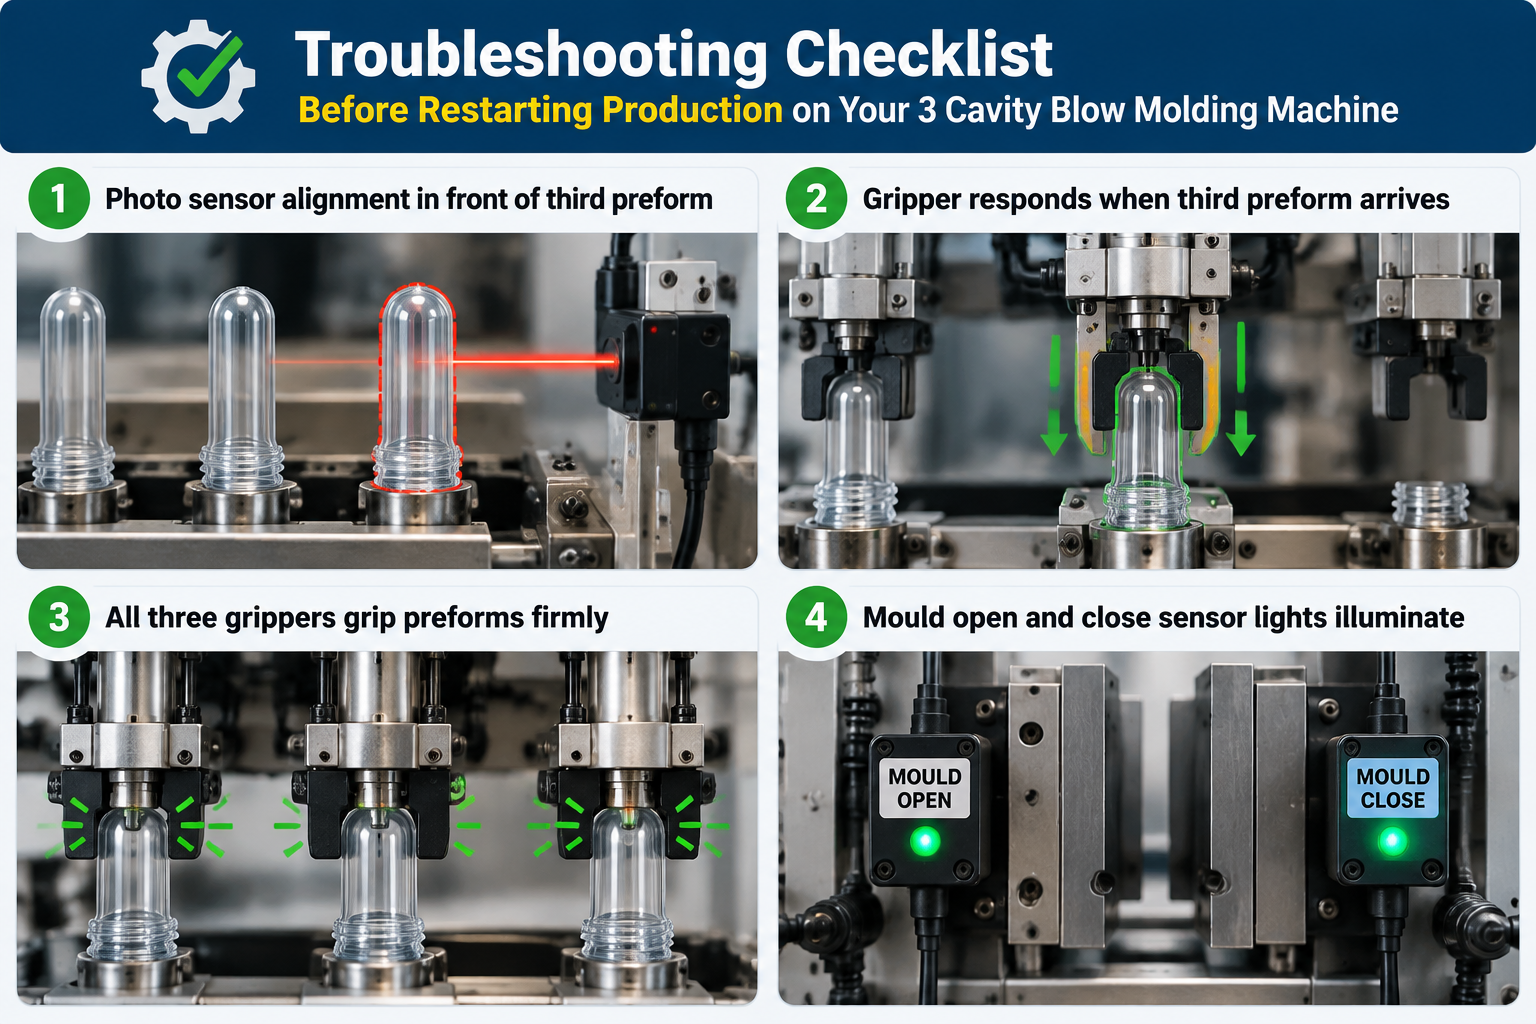
Use this checklist before restarting production:
- Photo sensor alignment in front of third preform
- Gripper responds when third preform arrives
- All three grippers grip preforms firmly
- Mould open and close sensor lights illuminate
- Hydraulic oil at correct level when mould is open
- High blow pressure appropriate for bottle size
- Rod and plate clearance approximately 2 to 3 mm
- No active alarms on PLC home page
- Correct recipe file loaded for current bottle size
- Sensors responding, functions operating correctly
OUR OTHER PRODUCT
When to Contact DTPPL for Technical Support on Your 3 Cavity Blow Molding Machine
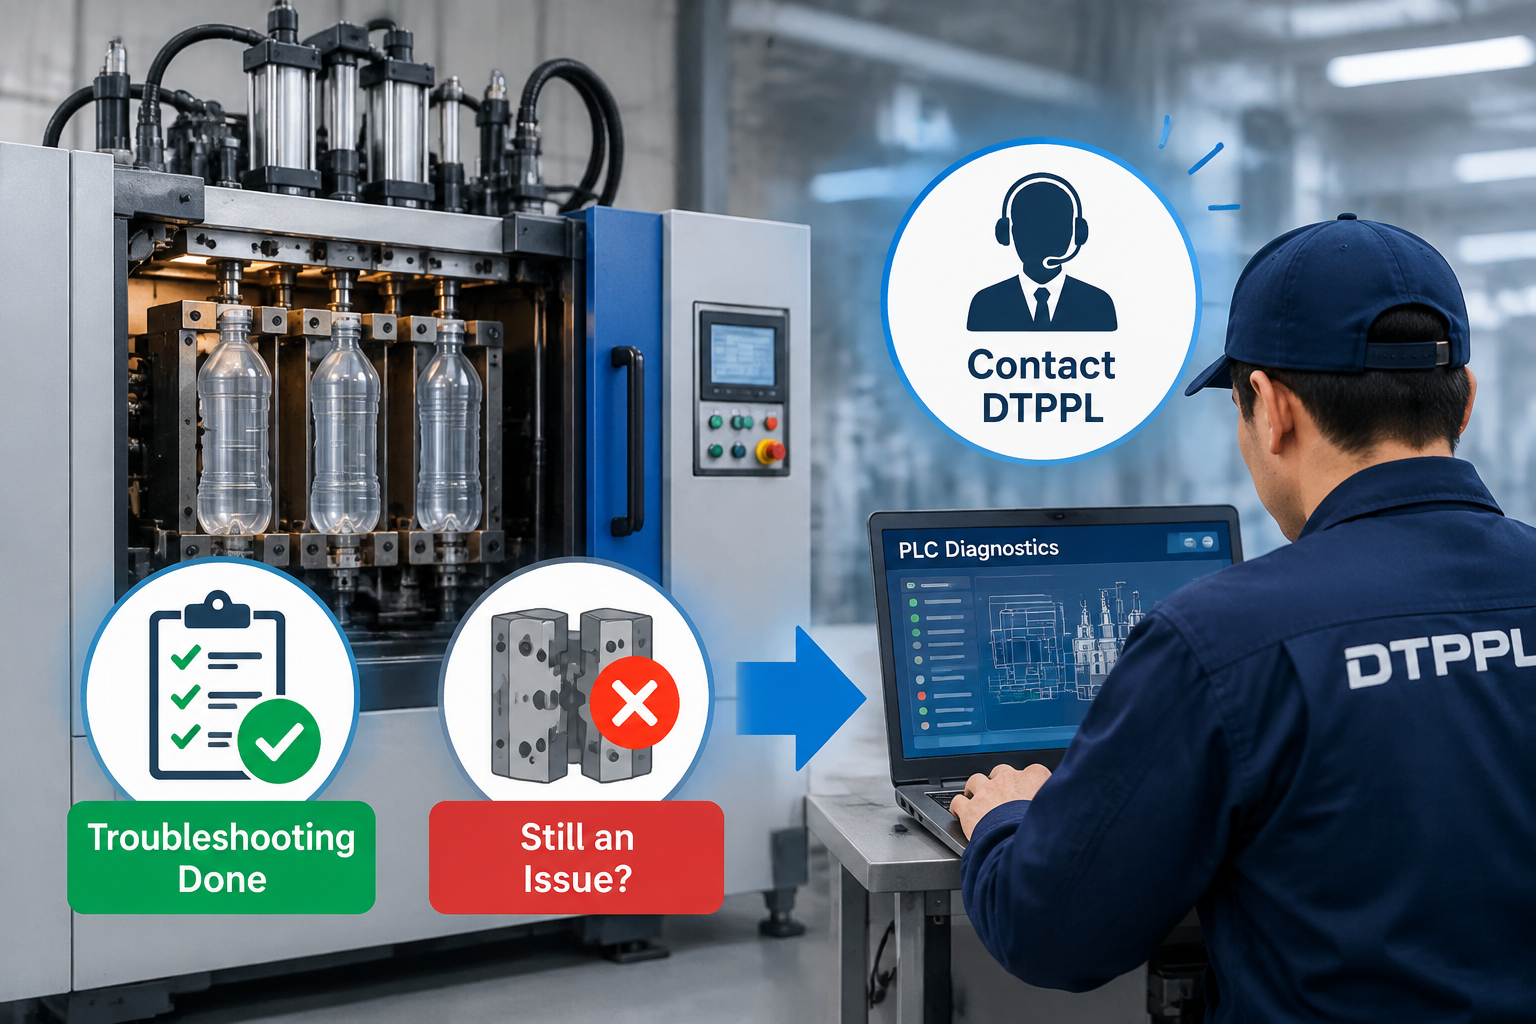
Contact DTPPL if you have completed all troubleshooting steps in this article but the underlying cause remains unclear, or if the mould repeatedly fails to lock in the closed position despite sensor adjustments and verification. DTPPL’s technical team can access PLC diagnostics and perform comprehensive inspections to identify complex issues that may not be visible during standard checks.
You should also reach out to DTPPL if bottle lines continue to appear on finished bottles even after checking and correcting the hydraulic oil level, blow pressure, and rod clearance, as this indicates secondary causes or component degradation beyond routine troubleshooting. An alarm that returns repeatedly after clearing also requires professional investigation to identify and address the root cause.
For sensor, hydraulic, pressure, or PLC adjustments that require professional expertise and specialized equipment, as well as major component failures, electrical issues, or mechanical damage, contact DTPPL to ensure the repairs are performed safely and accurately according to your machine’s specifications.
 Email!
Conclusion
Consistent bottle formation depends on accurate photo sensor detection, secure mould locking, correct hydraulic pressure, controlled blow pressure, and proper rod clearance. When all these elements work together, the machine operates smoothly with minimal rejections. Regular attention to these key areas helps mineral water bottling plants maintain high quality output and reduce downtime.
Frequently Asked Questions About the 3 Cavity Auto Blow Molding Machine
What does the photo sensor do in a 3 cavity auto blow molding machine?
The photo sensor detects the arrival of preforms and sends a command to the grippers. When the third preform reaches the sensor, all three grippers grip and hold the preforms, then move them into the moulds for bottle formation.
Why do preforms fall before reaching the mould in my 3 cavity blow molding machine?
Preforms fall when the photo sensor is not positioned correctly. If the sensor cannot detect preform arrival, grippers do not receive the grip command, and preforms fall without being held.
How can an operator check whether the mould open sensor is working on the 3 cavity auto blow molding machine?
Manually open the mould using the manual control button on the PLC. Observe the mould open sensor light. If it illuminates when the mould plates are fully separated, the sensor works correctly. If not, the sensor may need cleaning or repositioning.
Why does the mould close and then open again without locking on the 3 cavity blow molding machine?
If the mould close sensor does not detect the fully closed plate position, the PLC will not confirm that the mould is locked. Without this confirmation, the PLC allows the mould to open again. Check that the mould close sensor light illuminates when closed.
What causes a particle line to appear on PET bottles from the 3 cavity auto blow molding machine?
A particle line appears when the mould opens slightly during blowing. Three common causes are: low hydraulic oil in the cylinder, excessive high blow pressure, or incorrect rod and plate clearance. Check all three areas to identify the problem.
What information is available on the PLC home screen of the 3 cavity blow molding machine?
The home page displays heating settings, operating mode, active alarms, cycle time, bottles produced per hour, today’s production count and total machine production. It also allows you to reset the daily counter and clear alarms.
How do saved PLC recipes help during bottle size changes on the 3 cavity auto blow molding machine?
Saved recipes store specific timer, heater, and other settings for each bottle size. When you change the mould, simply load the corresponding recipe file, and the PLC automatically applies all correct settings. This eliminates manual entry and reduces errors.
What is the correct hydraulic rod and plate clearance for the 3 cavity blow molding machine?
The correct clearance should be approximately 2 mm to 3 mm between the hydraulic rod surface and the front plate. This ensures the mould closes smoothly without binding while maintaining proper sealing pressure during blowing.
Our associates











































Director – Global Marketing and Sales
Mr. Bhavesh from Dharmanandan Techno Projects Pvt. Ltd. has played a pivotal role in elevating the DTPPL brand to the global stage, leveraging his exceptional expertise in marketing and communications. He is committed to helping clients achieve significant growth while strengthening their own brands. Dharmanandan Techno Projects Pvt. Ltd. is a leading manufacturer and supplier of water purification systems and turnkey solutions for mineral water plants. With years of experience in designing and delivering high-quality water treatment solutions, the company provides end-to-end services, including system design, installation, maintenance, and ongoing support. Specializing in scalable and customizable water plants, DTPPL has successfully served industries worldwide, ensuring clean and safe drinking water across diverse applications.