




Listening Article
Table of Contents
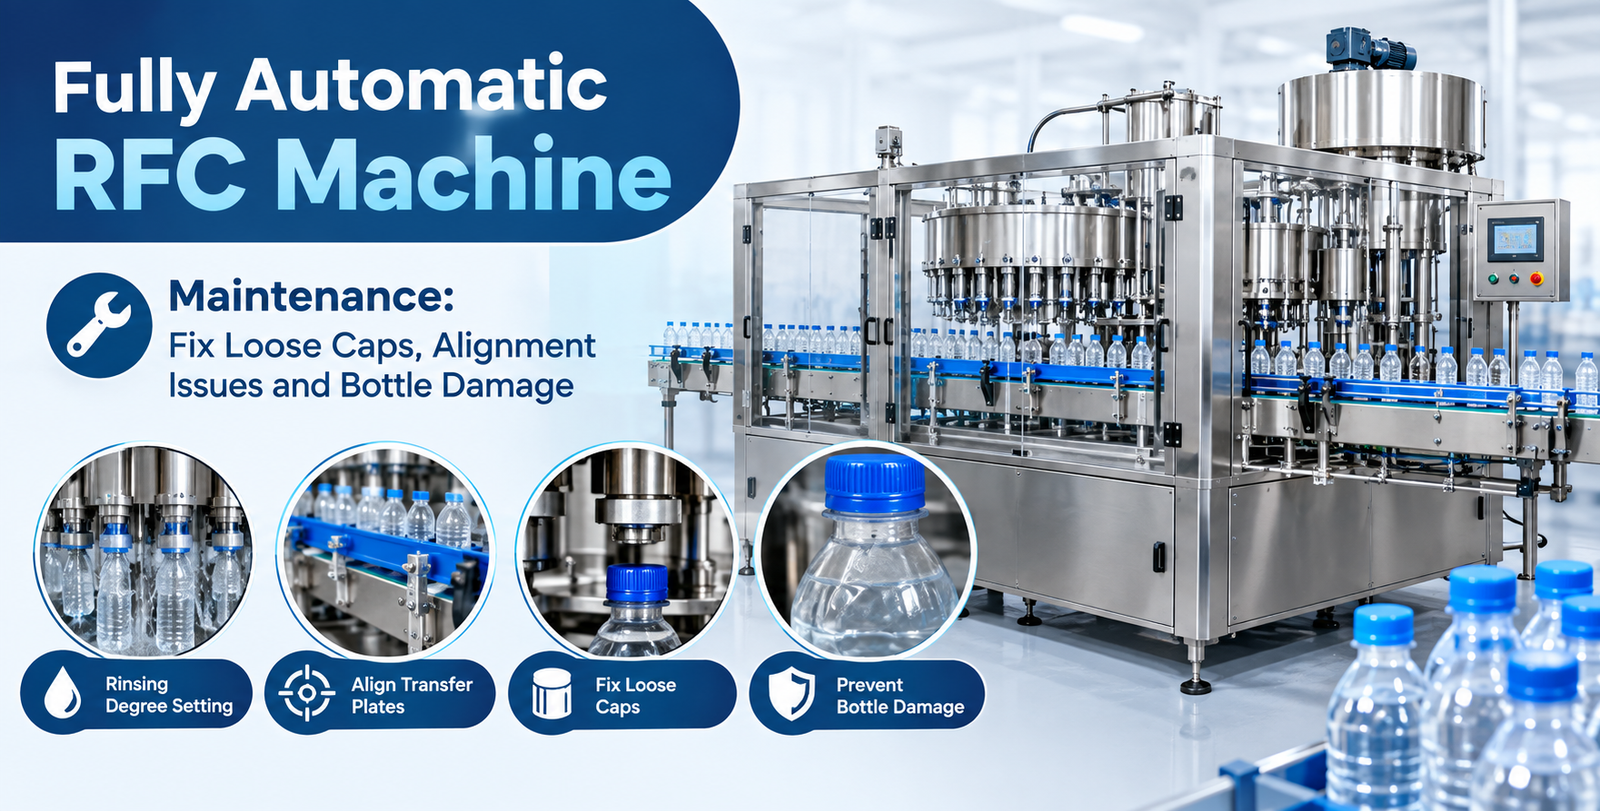
Fully Automatic RFC Machine Maintenance: Fix Loose Caps, Alignment Issues and Bottle Damage
September 29, 2026
AI Summary
This guide covers practical maintenance procedures for Fully Automatic Rinsing, Filling and Capping (RFC) machines used in mineral water plants. Learn how to correctly set the degree part in the rinsing section, align the machine’s transfer plates and capping assembly, and diagnose loose bottle caps caused by magnetic head issues, worn rubber seals, or improper capping head height. Proper maintenance and preventive bolt inspection prevent bottles from being crushed or gripped incorrectly, ensuring consistent cap seating and reliable production.
Understanding Fully Automatic Rinsing Filling and Capping Machine Maintenance
The Fully Automatic Rinsing, Filling and Capping Machine automates bottle cleaning, filling and capping in mineral water, soft drink and juice production. Dharmanandan Techno Projects Pvt. Ltd. (DTPPL) manufactures RFC machines designed to minimize downtime. These machines are the second most critical equipment in mineral water plants after water treatment systems, handling thousands of bottles daily.
This guide explains maintenance procedures for RFC machines, helping mineral water plant owners and operators understand their equipment and prevent common problems. Understanding how the degree part, transfer plates and capping assembly work together is essential for reliable production.
 Call Now !
Why Bottles Are Not Held Correctly in the RFC Machine Rinsing Section
The degree part controls how the washing catcher grips the bottle during rinsing. When correctly set, it holds the bottle securely by the neck. When bent or loose, it causes the catcher to grip too high or too low, or drop away entirely.
Common symptoms include bottles gripped incorrectly, or bottles falling during the rinsing cycle. Loose bolts are the main cause. When fasteners become loose, the degree part shifts position during operation, preventing proper bottle neck grip.
How to Set the Degree Part in the RFC Machine Rinsing Section
Setting the degree part correctly is one of the most important maintenance procedures for RFC machines.
Position the machine so the degree part is easily accessible. Open the upper bolt holding the degree part. Above it, find the Y bracket. Inside is a second bolt requiring a number 5 Allen key. Open both bolts, then remove the spring beneath the degree part.
Adjustment depends on how the catcher grips:
If too low, widen the degree part using a hammer strike (2 to 3 mm movement). If too high, strike inward to bend it (2 to 5 mm movement). The final setting must hold the bottle at the neck properly.
After adjustment, refit the spring and retighten both bolts securely.
Safety Note: Only trained and authorised personnel should adjust the degree part. Stop the machine and isolate electrical and pneumatic energy before work. Never adjust while powered or operating.
Why Bottles Get Crushed or Fall Inside the RFC Machine
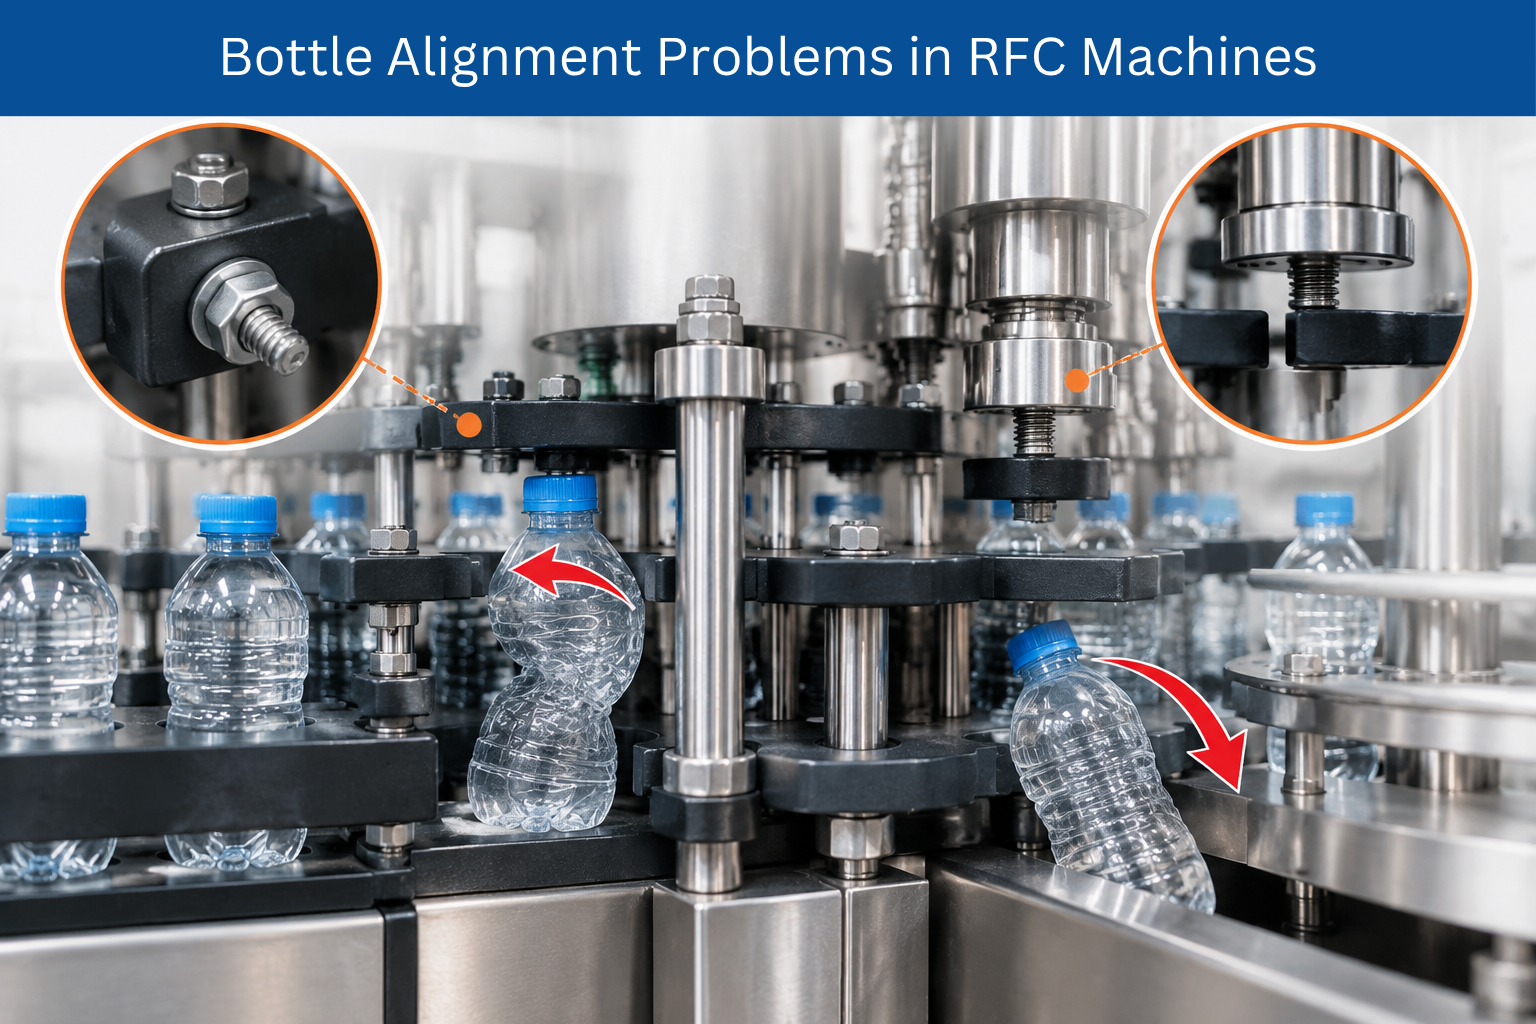
Bottles are crushed or dropped when transfer plates and capping assemblies are misaligned. Misalignment develops when bolts loosen during continuous operation. Without frequent bolt inspection, machines lose alignment within 15 to 30 days. This is why daily bolt inspection is essential preventive maintenance.
How to Align the Rinsing, Filling and Capping Sections of the RFC Machin
Use the capping assembly as the primary reference point. All other components are aligned relative to this reference.
Loosen two plate bolts to move plates into alignment. The capping assembly has four upper bolts allowing it to move. Loosen the four bolts below the filling tank to move it.
Align in sequence: capping assembly first, then capping plate, filling tank, filling plate, washing plate, washing catcher, and entry plate. Test at controlled speed before full production.
After confirming alignment, retighten all loosened bolts in proper sequence.
OUR OTHER PRODUCT
Daily Alignment and Bolt Inspection Checklist for the RFC Machine
Inspect daily: all visible machine bolts, transfer plate bolts, washing catcher bolts, filling tank bolts, capping assembly bolts, and connection points between plates.
When a bolt is loose, tighten it using the appropriate tool. Do not overtighten. Regular tightening maintains alignment and prevents crushed bottles and downtime. Many operators use a simple daily checklist form to document inspections.
Why Bottle Caps Remain Loose After the RFC Machine Capping Process
A loose cap shows an excessive gap between the lower edge of the cap and bottle neck. While a tiny gap is normal, caps that fail to seat properly allow leakage.
Three primary factors prevent proper cap seating:
- Insufficient magnetic force in the capping head
- Worn or damaged rubber seals inside the capping head
- Incorrect capping head height
Identifying the cause requires careful observation. Most loose cap problems are caused by individual capping head issues rather than machine assembly level problems.
How to Adjust the Magnetic Capping Head on the RFC Machine
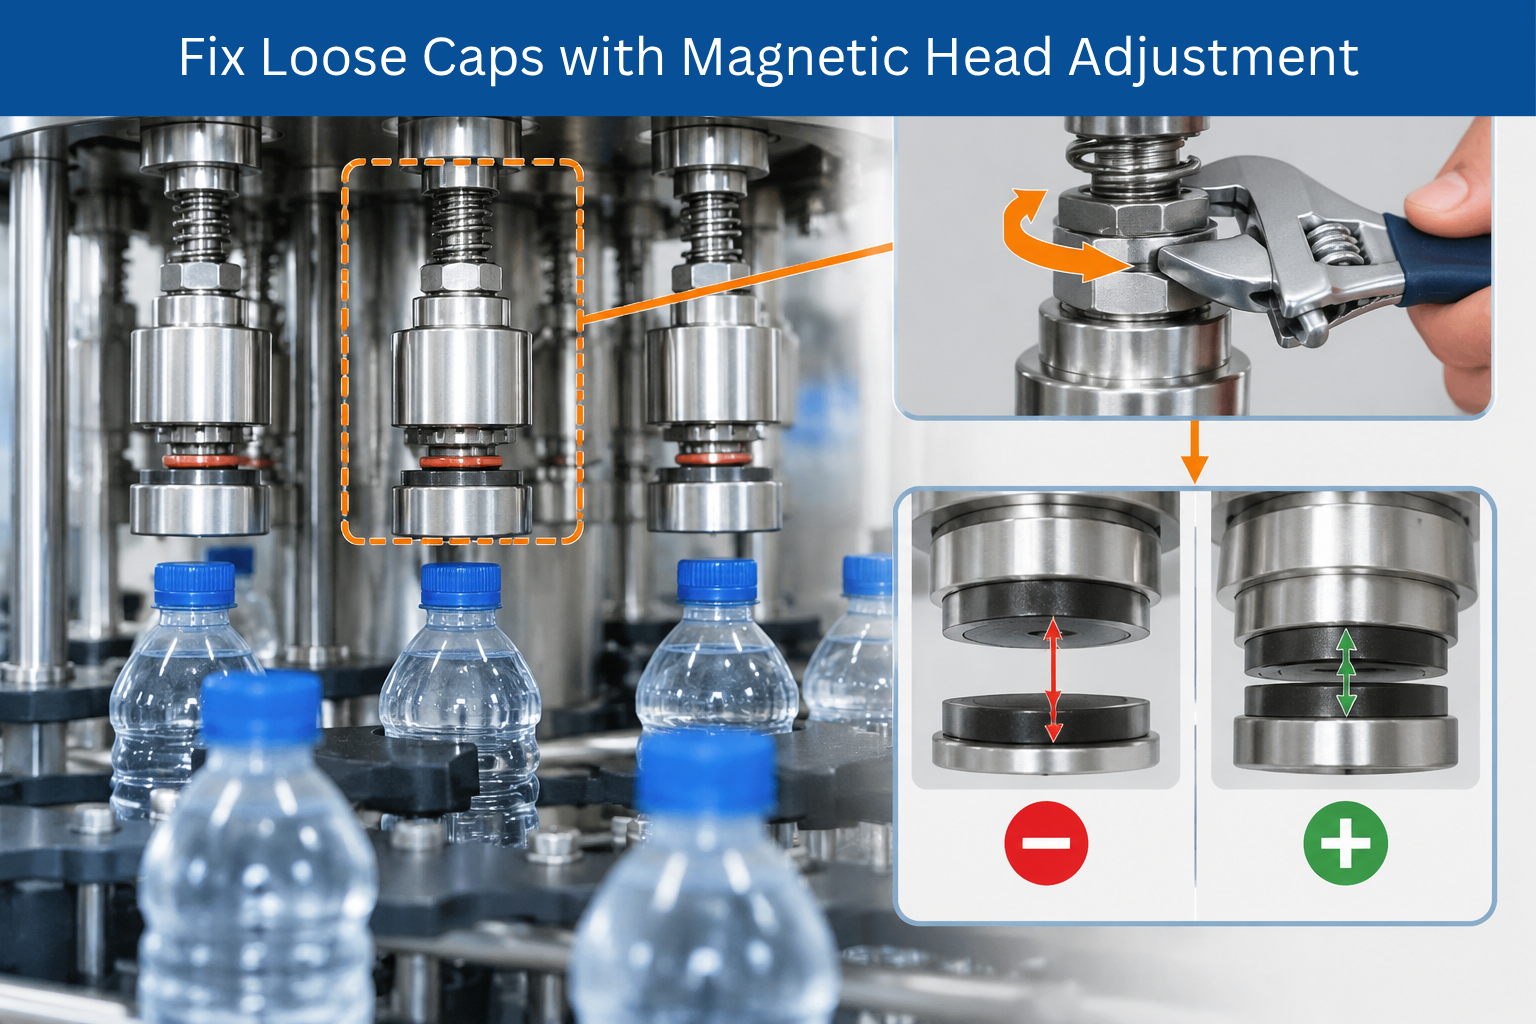
Identify which head produces loose caps by observing production. Loosen its upper check nut. Inside are two magnetic sections. Increasing the gap between magnets reduces magnetic force. Decreasing the gap increases magnetic force.
Adjust only the problem head. After adjustment, tighten the check nut securely using a large adjustable wrench. Test at controlled speed before full production.
Read Our Article
Top Industries Suited to 5,000–10,000 LPH Mineral Water Plant
How to Replace Worn Capping Head Rubber Seals on the RFC Machine
Rubber seals in the capping head degrade over time. When worn, they cannot hold the bottle securely, resulting in loose caps.
Identify the leaking head. Open the lower section by removing the fastening bolt with a screwdriver. Remove all three rubber seals. Replace with new seals matching the original design and positioned correctly in their grooves.
Reassemble and tighten bolts securely. Rubber seals are consumable parts available through DTPPL. Replacement frequency depends on production volume and operating conditions. Test the machine to confirm proper cap tightening.
Client Review
“The maintenance guidance provided by DTPPL for our Fully Automatic RFC Machine has been exceptionally helpful. Their technical team walked us through practical troubleshooting steps to resolve cap-tightening inconsistencies, fine-tune mechanical alignment, and eliminate bottle damage during production. The clear instructions made it easy for our floor team to implement immediate fixes and improve overall line efficiency.”
– Dhruv Rathi
How to Adjust Individual Capping Head Height on the RFC Machine
When one head produces loose caps, it may be positioned too high or low. Loosen the check nut on the problem head. Lower it gradually by 1 to 2 millimetres according to cap seating position.
Do not let the head touch the capping plate, as this damages rubber seals. Retighten the check nut securely and test at controlled speed.
How to Adjust the Complete Capping Assembly on the RFC Machine
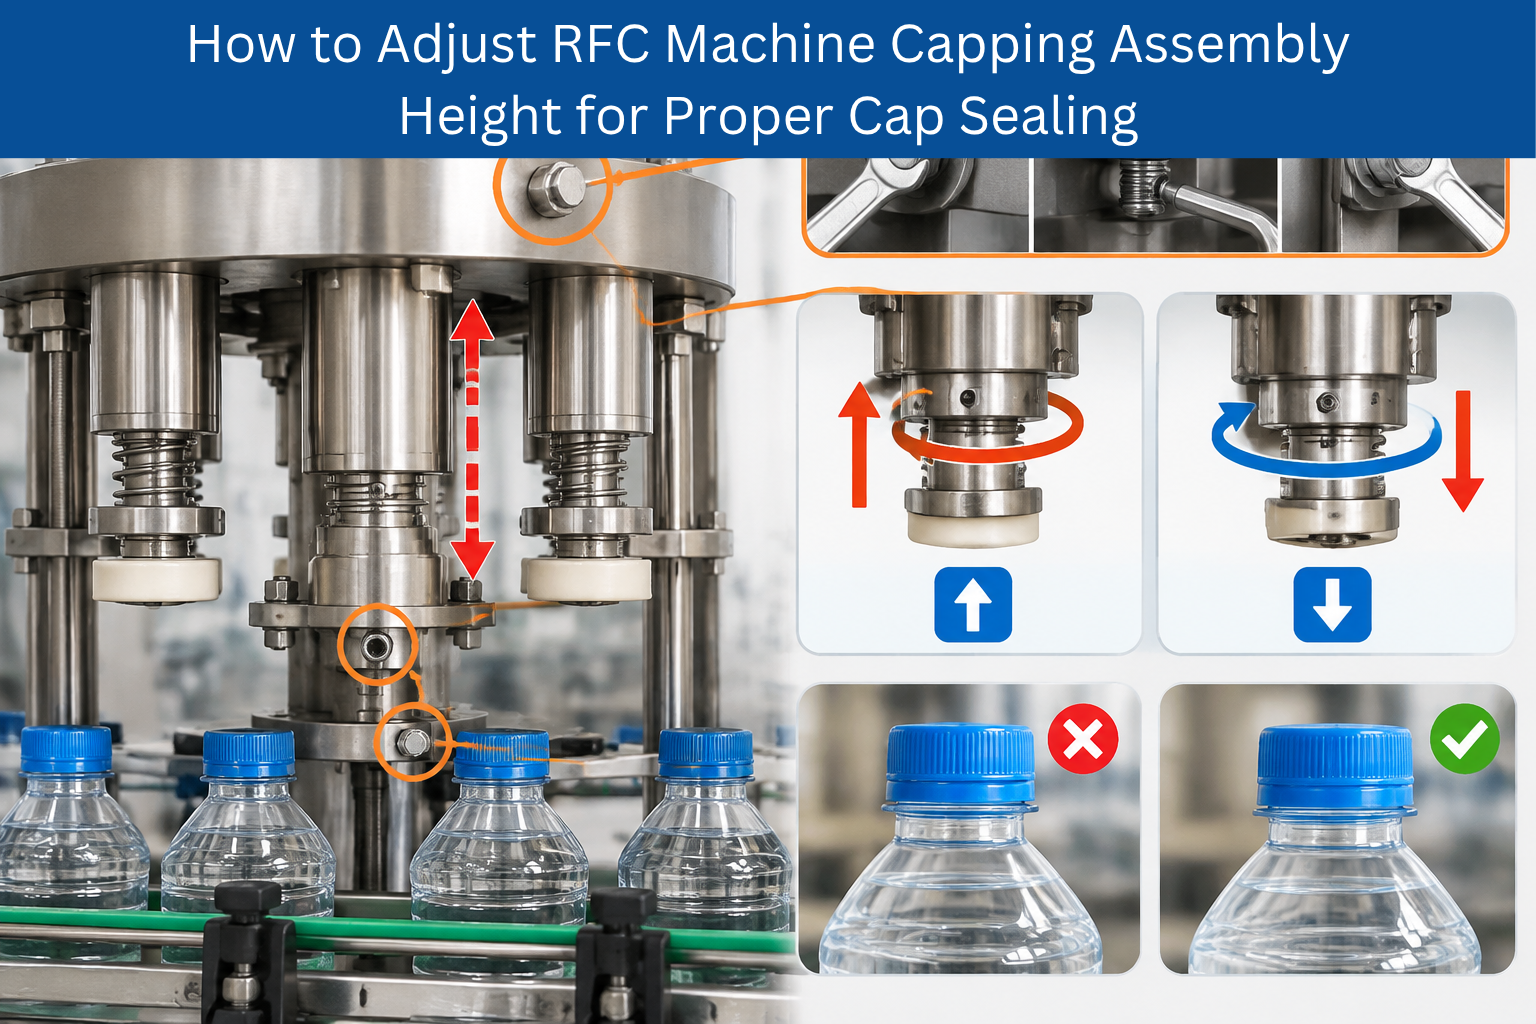
If most bottles have loose caps, the entire assembly may be at the wrong height. Using a 16 or 17 wrench, loosen the bolt on the assembly, the grub screw at the bottom, and the hex bolt.
Clockwise rotation moves the assembly upward. Anticlockwise rotation moves it downward. Rotate until cap seating improves across all bottles. Retighten all fasteners and test.
Most loose cap problems are individual head issues, so adjust single heads first before considering assembly adjustments.
Final Checks Before Restarting the RFC Machine After Maintenance
Before returning the machine to production:
Confirm degree part position and catcher grip. Verify spring and bolts are secure. Check plate alignment with catchers. Confirm filling tank alignment. Verify capping assembly position and bolt tightness. Check magnetic head grip and rubber seal condition. Confirm individual head heights and cap seating. Remove all tools from work area. Perform a controlled test run at reduced speed, watching for bottle problems or loose caps. Only return to full production after confirming all checks pass successfully.
 Email Us Now!
When to Contact DTPPL for Technical Support
Contact DTPPL when:
Bottles continue to fall or get crushed inside the machine after following the alignment procedure. The degree part repeatedly bends, even after adjustment and with secure bolts. Machine alignment does not remain stable despite regular bolt tightening. Several capping heads are producing loose caps even after individual adjustment. You are uncertain which adjustment is required or which component is causing the problem. Production delays continue despite attempting the troubleshooting procedures described in this guide.
OUR OTHER PRODUCT
Conclusion
Proper maintenance requires understanding how the degree part, transfer plates and capping assembly work together. Correct degree part setting prevents bottle gripping problems. Sequential machine alignment prevents crushing and dropping. Regular magnetic head adjustment and rubber seal replacement maintain cap seating.
Daily bolt inspection and tightening prevent misalignment problems. Following these maintenance procedures helps mineral water plant teams operate RFC machines reliably and maintain consistent product quality.
Frequently Asked Questions About RFC Machine Maintenance
What does the degree part actually do in the rinsing section of my RFC machine?
The degree part controls how the washing catcher grips the bottle during rinsing. When correctly set, it holds the bottle by the neck securely. When bent or positioned incorrectly, it causes the catcher to grip too high or too low, allowing bottles to fall.
Why is my washing catcher gripping bottles too high on the neck, or why is it gripping too low?
A bent or incorrectly positioned degree part causes this problem. Loose bolts allow it to shift during operation. Adjust the degree part using a hammer strike to widen it (if too low) or bend it inward (if too high) by 2 to 5 millimetres.
What causes bottles to get crushed inside my RFC machine?
Misalignment between transfer plates and capping sections forces bottles into narrow gaps. Misalignment develops when bolts become loose during production. Inspect and tighten all visible bolts daily to prevent this problem.
Which part of my RFC machine should be the main reference point when aligning the entire machine?
The capping assembly is the main reference point. All other components are aligned relative to it. This ensures bottles transfer smoothly without crushing or falling.
What are the three main reasons why bottle caps remain loose after the capping process?
The three causes are insufficient magnetic force in the capping head, worn rubber seals inside the capping head, and incorrect capping head height. Identify which cause applies and adjust accordingly.
When should I adjust only a single capping head, and when should I adjust the entire capping assembly?
Adjust a single head when one or two bottles among many have loose caps. Adjust the entire assembly only when most or all bottles consistently have loose caps. Always start diagnosis at the individual head level.
How often do I need to replace the rubber seals in my RFC machine capping heads?
Replacement intervals depend on production volume and operating conditions. Inspect seals regularly for wear, cracking or hardening. Replace when seals show degradation or when caps begin leaking despite adjustment. Seals are available through DTPPL.
Our associates











































Director – Global Marketing and Sales
Mr. Bhavesh from Dharmanandan Techno Projects Pvt. Ltd. has played a pivotal role in elevating the DTPPL brand to the global stage, leveraging his exceptional expertise in marketing and communications. He is committed to helping clients achieve significant growth while strengthening their own brands. Dharmanandan Techno Projects Pvt. Ltd. is a leading manufacturer and supplier of water purification systems and turnkey solutions for mineral water plants. With years of experience in designing and delivering high-quality water treatment solutions, the company provides end-to-end services, including system design, installation, maintenance, and ongoing support. Specializing in scalable and customizable water plants, DTPPL has successfully served industries worldwide, ensuring clean and safe drinking water across diverse applications.